
Anime Zero First Story Clear: Waves, Cooldowns and the Boss
Follow a player’s real Anime Zero Story run, read the wave indicators, group enemies for skills and approach the Boss Wave with a clear plan.
FAQ
Which mode does the source recommend for a first run?
How do I know whether a wave is finished?
Should I use an area skill on every individual enemy?
What should I do while boss-fight skills are on cooldown?
Are the screenshots from this wiki’s own account?
What should you check before entering Story?
Start with a usable loadout and spend available skill tokens deliberately. Ashira recommends Story as the first learning mode after preparing weapons and early upgrades. His recorded run uses Easy. Your first goal is to recognize the combat loop and finish a manageable run, rather than copy an endgame weapon ranking immediately.
Check the equipped weapon pair and skill tree before queueing. If you are claiming free resources, use the codes page rather than assuming the October 1 video’s code list remains current.
Which indicators tell you what is left to clear?
Read the area counter, current wave and remaining enemies together. The 2:20 frame shows Easy, Area 3/5, Story Wave 1/2 and Enemies Alive 01. It is a snapshot of progress inside a run. A low enemy count does not mean the whole dungeon is finished when later areas or waves remain.
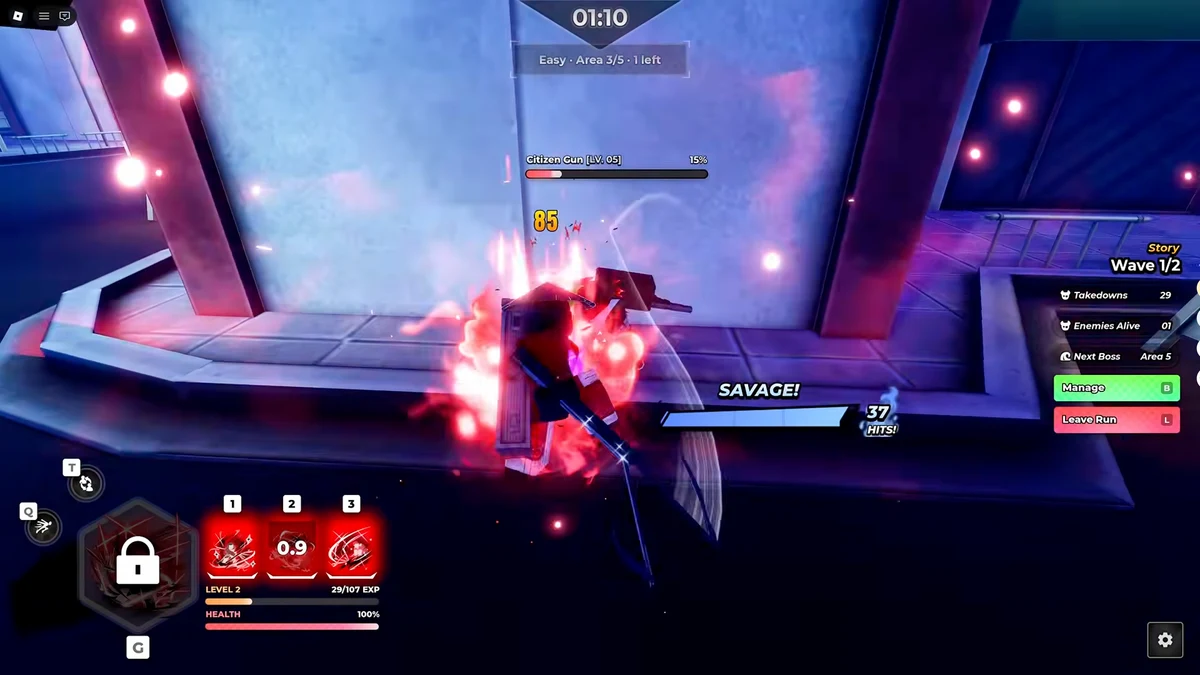
Screenshot: Ashira RBX, 2:20 in the original guide. Read the progression labels and cooldown feedback; the visible hit value is not a weapon benchmark.
| Indicator in the footage | What to use it for |
|---|---|
| Area 3/5 | Recognize that more areas remain in this recorded stage. |
| Wave 1/2 | Track the current area’s wave progression. |
| Enemies Alive | Check for remaining targets before looking for the next objective. |
| Next Boss | Notice the approaching boss checkpoint. |
| Skill countdown | See which action is recovering before attempting another cast. |
How do you stop wasting skills on scattered enemies?
Let enemies approach the same space before spending an area attack. Ashira’s practical tip is to hit several enemies with one skill instead of casting separately at every target. Choose a position where the approaching pack is easier to track, then check that the targets are actually within your weapon’s attack area.
A simple learning sequence is:
- Look at the pack before starting your skill chain.
- Move so enemies approach a common spot.
- Use an available area skill when its targets are together.
- Watch cooldowns and health before following with another skill.
- Check Enemies Alive for a survivor rather than running straight ahead.
This is advice from the source, not a promise that every skill hits through walls or reaches every enemy. Different kits need different spacing.
What changes when the Boss Wave begins?
Switch from clearing a pack to watching one enemy’s attacks and your own recovery windows. At 2:51, the footage explicitly shows Boss Wave and Chrollo [BOSS], with a separate health bar. Ashira recommends keeping some distance while skills recover and learning the boss instead of standing close and taking unnecessary damage.
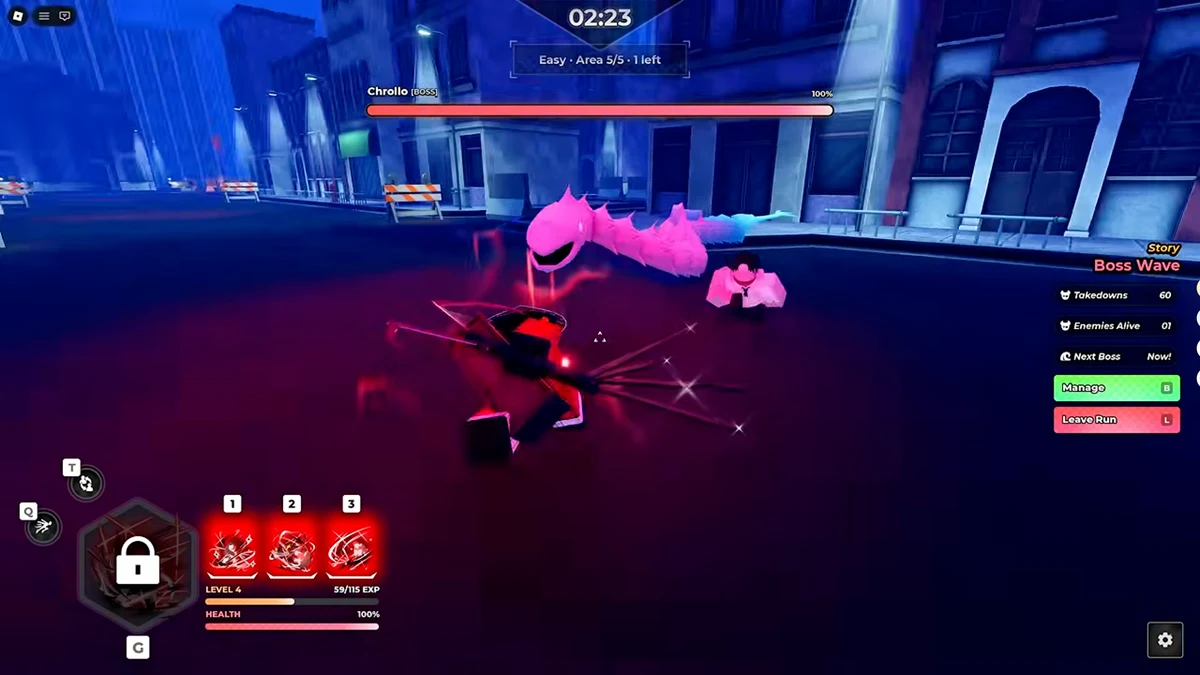
Screenshot: Ashira RBX, 2:51. Chrollo is the boss shown in this recording; this does not establish that every Story stage has the same boss.
Before committing your next attack, check whether the skill is ready and whether the boss is starting an attack. Cooldown reduction can create more opportunities, but it cannot make a missed skill useful. This excerpt does not establish exact dodge timing, invulnerability duration or a safe spot for every boss move.
What should you do if the run fails?
Change the part that actually caused the failure. If scattered enemies consumed all your cooldowns, practice grouping. If you survived but took too long, inspect damage upgrades. If the boss killed you while skills were unavailable, work on spacing and recovery windows. Repeating a different, harder stage makes those comparisons less useful.
| What happened | Next adjustment to investigate |
|---|---|
| Skills repeatedly hit only one target | Group enemies before the next area attack. |
| Enemies remained after you moved on | Watch the enemy count and search for survivors. |
| Most health was lost while waiting for skills | Create distance and watch attacks during recovery. |
| Regular packs took too long despite comfortable survival | Review the equipped weapon and attack branch. |
Keep stage and difficulty consistent while learning. A player tier list can suggest weapons to investigate, but it does not explain every failed run.
What should you claim after returning to the lobby?
Check completed milestones, quests and achievements before immediately starting another run. Ashira’s follow-up advice is to use these reward menus as part of progression. Look at the objectives before entering a stage, then return to claim completed entries. That gives your next upgrade a clearer purpose than spending every new balance on summons.
If you collected crafting materials, read the accessory guide before choosing a recipe. Exact payouts and completion requirements still need current-client verification; this walkthrough does not publish a guaranteed currency total or leveling speed.

Ashira RBX — Story combat and progression rewards
Related Articles
guides
Anime Zero Accessories: Craft a Crown or Keep Sunglasses?
Compare Blast Archer Crown and SunGlasses in real crafting screens, match gear to your build, and plan materials before using Quick Craft.
guides
Anime Zero AFK Chamber: Check the Timer Before Farming
Read an actual Anime Zero Time Chamber screen and compare two players’ AFK reports without mistaking an old event for guaranteed current rewards.
guides
Anime Zero Beginner Guide: Your First Run and Next Upgrade
Start Anime Zero with a clear progression loop: prepare your loadout, learn Story, check completed rewards and choose upgrades using dated player guides.
Was this helpful?
Thanks for the feedback!